
how to build a curved roof:One of the most important & significant features in any roof structure is its curve. A roofing system, whether it’s for a house or another structure, comes in all shapes and sizes.
Whether you’re building a house, a garage or just an outdoor shed, curved roofs can either increase the style and aesthetic quality of your home or provide a more structurally sound roof than a gable roof. The simplest way to build a curved roof is to create the necessary supports underneath and attach them all to each other at the peaks, then attach roof boards to each support.

How to build a curved roof
Curved roofs are beautiful, but how do you build them? Curved roofs are built in the same way as straight roofs, except that they are curved. It is possible to use a variety of materials to build curved roofs, including shingles, tiles and slate. Curved roofs can be built using either a frame or a truss structure.
How to Build a Curved Roof Structure
The first step in building any type of roof is to create a strong foundation for your home. Without this solid base, your roof will not be able to support itself or the weight of the materials you choose to use on top of it. You should consult with an experienced contractor who knows how to construct foundations for curved roofs before beginning any construction work.
Once you have completed your foundation, you can begin framing up the rest of your house. This process should take place inside so that no one gets hurt by falling debris while working on their roof. Once all of the framing has been completed, you can begin adding shingles or other types of covering material onto your roof frame.
If you’re planning to build a curved roof structure, here are some tips that will help you get started.
A curved roof structure is typically used for two reasons: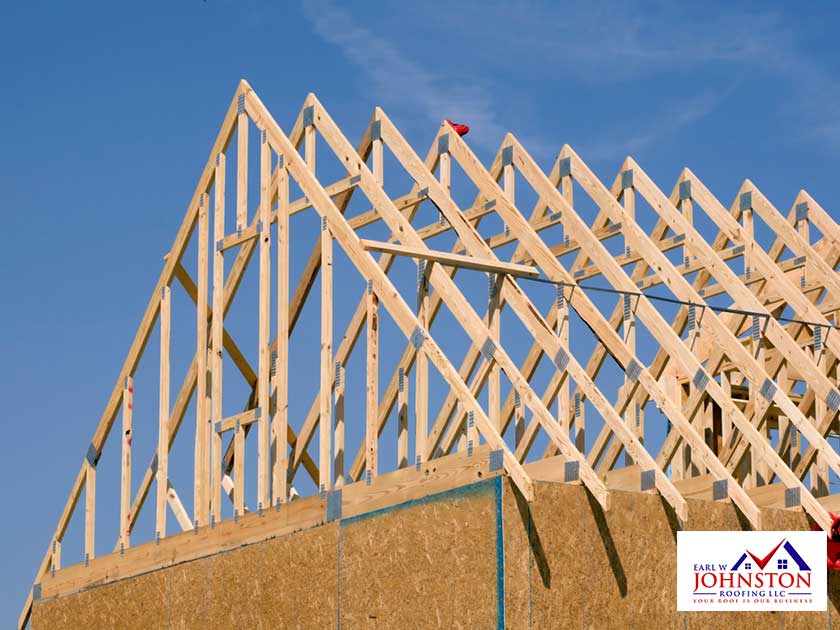
To create an ornamental effect.
To make use of an otherwise unusable space.
A curved roof structure can be built from any material but the most common ones are:
Wood.
Metal.
Concrete.
Building a curved roof is not as difficult as it seems. The most important thing to remember is that you need to use suitable materials and take the necessary precautions to ensure that your curved roof lasts for many years.
Building a curved roof structure is not as difficult as it seems. The most important thing to remember is that you need to use suitable materials and take the necessary precautions to ensure that your curved roof lasts for many years.
Materials needed:
plywood or OSB (oriented strand board) sheets
hangers (typically steel)
roofing felt or underlayment material
nails or screws
A curved roof is the most challenging type of roof to build. Not only does it require a lot of planning and skill, but it also takes longer to construct than most other types of roofs. However, because a curved roof is so unique and exotic-looking, many people want one for their homes.
If you’re considering building a curved roof, there are several things you should know before you begin. First, how much does it cost to build a curved roof? Second, how long does it take to build one? And third, what kind of materials do I need? We’ll address all three questions below:
1) How Much Does It Cost To Build A Curved Roof?
The average cost of building a curved roof ranges between $75 – $100 per square foot (psf) with the average home being about 2,400 psf. So if your home is 4,000 square feet (which is large), then it will cost between $150,000 – $200,000 just for labor costs alone! You may also need to pay for material costs as well depending on how complex your design is going to be and/or whether or not you’re using wood or metal trusses in your design.
2) How Long
The curved roof structure is one of the most complicated structures in architecture. It is used by architects to build some special buildings, such as stadiums, theaters, and so on.
The curved roof structure has many advantages. First of all, it can reduce the pressure on the building, so that the building can be more stable and durable. Secondly, it is easy for people to get inside the building through the ridge or hip of the curved roof structure. Moreover, it can be used for decoration purposes as well. For example, some large stadiums have a big curve at their end to make them look more attractive.
The curved roof structure is a very common design for a porch or deck. It looks great and adds a lot of character to the house. The process for building a curved roof is simple, but it does require you to follow certain steps.
Here are the steps in building a curved porch roof:
1. Create the frame for the curved roof structure by attaching 2x4s together with nails and screws. You can also use metal connectors for this purpose.
2. Attach plywood sheets to the frame using nails or screws. Ensure that all plywood sheets are properly aligned so that they will form a smooth curve when you install them on your shed, deck or porch later on.
3. Install ridge boards along the top of your framing structure using metal connectors or wooden brackets, as well as rafters at regular intervals along both sides of the ridge board using metal connectors or wooden brackets as well (see image above). If you plan on installing siding over your roof, then leave enough room between rafters so that you can install siding without having any problems fitting them into place later on after they have dried out completely after being painted with waterproof paint or stain (see image below).

A curved roof structure can make a large difference in the look of your home. The structure will add character and style to your porch or patio. However, you need to know how to build a curved roof structure so that you can get the best results.
You can use natural materials such as wood or metal or you can use modern materials like aluminum or steel. You can also use different types of shingles and tiles for your roofing material.
Step 1 – Planning Your Curved Roof Structure
The first thing that you need to do when building a curved roof structure is planning it out. You need to think about the location of the structure and what kind of shape would work best for it. You should take measurements from several angles and check out different options before deciding on one design for your curved roof structure.
Step 2 – Building Your Frame
Once you have decided on the design for your curved roof structure, it’s time to start building it! First, mark out where all of your framing pieces will go and cut them out using a circular saw with a blade designed specifically for cutting wood curves (if you are using wood). Then nail them together using galvanized nails so that they stay sturdy once they are installed in place
The first step to constructing a curved roof is to determine the curved shape of the roofing surface. This can be done by measuring the radius of the curve and dividing that number by 6, which is the distance between each rafter. The result will be the number of feet between each rafter.
As an example, if you wanted a 30-foot radius you would divide 30 by 6 and get 5.6 feet. This means that each rafter would be spaced 5.6 feet apart from each other on your roof. The next step is to figure out how many rafters you need for the project.
Once you have determined how many rafters are needed for your project, it’s time to figure out what size they need to be cut at their ends where they meet at a peak or valley in your roof design (for more on this see How to Build A Hip Roof). Once again, using our example with a 30-foot radius, we would take 5.6 feet and subtract 2 inches from it because we need 2 inches of overhang on each end of our rafter (1 inch on each side) so that they can overlap when they meet up at their peak point on our curved porch roof structure
The curved porch roof is a common element of many homes. You will find it on houses that have a Victorian style or other architectural styles that use this type of roofing. This type of roof is also referred to as a Mansard roof or Gambrel roof. The curved porch roof can be built using several different materials depending on what your plans are for the finished product.
This article will show you how to build a curved porch roof using the Gambrel method, which is the most common method used.
Start by preparing your frame for the Gambrel Roof. This requires cutting two pieces of 2″x10″ lumber so they are 66″ long and one piece that is 52″ long. Make sure all pieces are straight and square before proceeding with the next step. Once you have these pieces cut, attach them together using 3 1/2″ nails or screws so that they make up a triangle shape when viewed from above (see diagram). Place them so that when viewed from above they form an “A” shape with each side being equal in length (see second diagram). Attach one end of each 2×6 board to each side piece using 3 1/2″ nails or screws (see third diagram).
The curved roof is a little more complex and requires some special techniques. The first step is to create a template for the shape of the roof. You can use either cardboard or plywood for this purpose. Mark the points on the template where you want to place rafters, then connect them with straight lines.
The next step is to cut out two pieces of plywood based on the template and attach them to each other with nails or screws. Then cut out several rafters from 2×4 lumber and attach them to the plywood with nails or screws. Cut off any excess wood that’s sticking out beyond the edge of your building material.
Now it’s time to build your frame! Start by attaching one end of a beam onto one side of your structure, then attach another beam on top of it so that they’re parallel with each other but don’t overlap each other yet (this may require cutting down some pieces). Then continue adding beams until you reach the top of your roof — make sure they’re spaced evenly apart so that they support each other properly! When you’ve reached the top, secure another beam right underneath where it meets (or almost meets) your existing beams so that they don’t move around as much when you add.