
The 2×4 wall is the building method of choice for a variety of custom homes in Colorado. This framing technique involves two interior walls constructed with 2×4 (also known as two-by-four or 24) lumber. Let’s talk about the four walls that make up this building style.
Have you ever tried to build a wall in your yard? If you have then you know it’s not as easy as it looks on TV. You might think that 2×4 wall panels are easy to install and look great. The problem is they take at least an hour to build. This is time you don’t need to spend wracking your brain over ways to improve your reading speed. (If you don’t know what 2×4 wall panels are then check out these helpful tips).
How to build a 2×4 wall
A stud wall is a wall built using studs, which are vertical wooden boards that have been attached to the framing of your home. Stud walls can be built using a variety of materials, including plywood and OSB (oriented strand board).
The most common way to build a stud wall is by attaching 2×4 lumber to the inside of the wall frame. This means that if you want to create a 16-foot-long wall, you might need four 8-foot 2x4s and two 4-foot 2x4s. Alternatively, you could use 2×6 lumber for longer walls or use larger lumber if you’re building something very substantial.
Step 1 – Measure Twice and Cut Once
When building a stud wall on your own property, it’s important that everything fit together properly so it doesn’t look crooked or uneven once complete. To ensure this, measure twice and cut once! You’ll also want to make sure that your cuts are straight so that everything fits where it needs to go with no gaps between boards or uneven angles in your walls once completed.
Step 2 – Frame out the Wall
Once you have all of your pieces cut, lay them out on their side so that they’re easier to carry around as
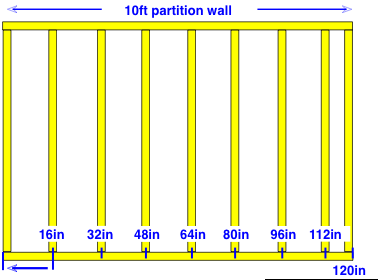
A stud wall is the most common type of wall used in residential construction. It’s made up of vertical wooden studs that are spaced 16 inches on center and are typically 2×4 or larger. Studs are attached to each other with nails or screws, and they’re connected to the floor with joists (horizontal boards).

You can use this guide to learn how to build a stud wall from scratch, but it will also help you if you need to repair a damaged wall or add additional framing for a second story addition.
It’s important to note that different regions have different codes governing how much space should be left between studs for insulation purposes. This guide gives information about standard construction practices for building a 2×4 wall using dimensional lumber (2x4s) and plywood sheathing (OSB or plywood sheets). For more information about insulation requirements, see our article on how much insulation should go between each stud in your walls.
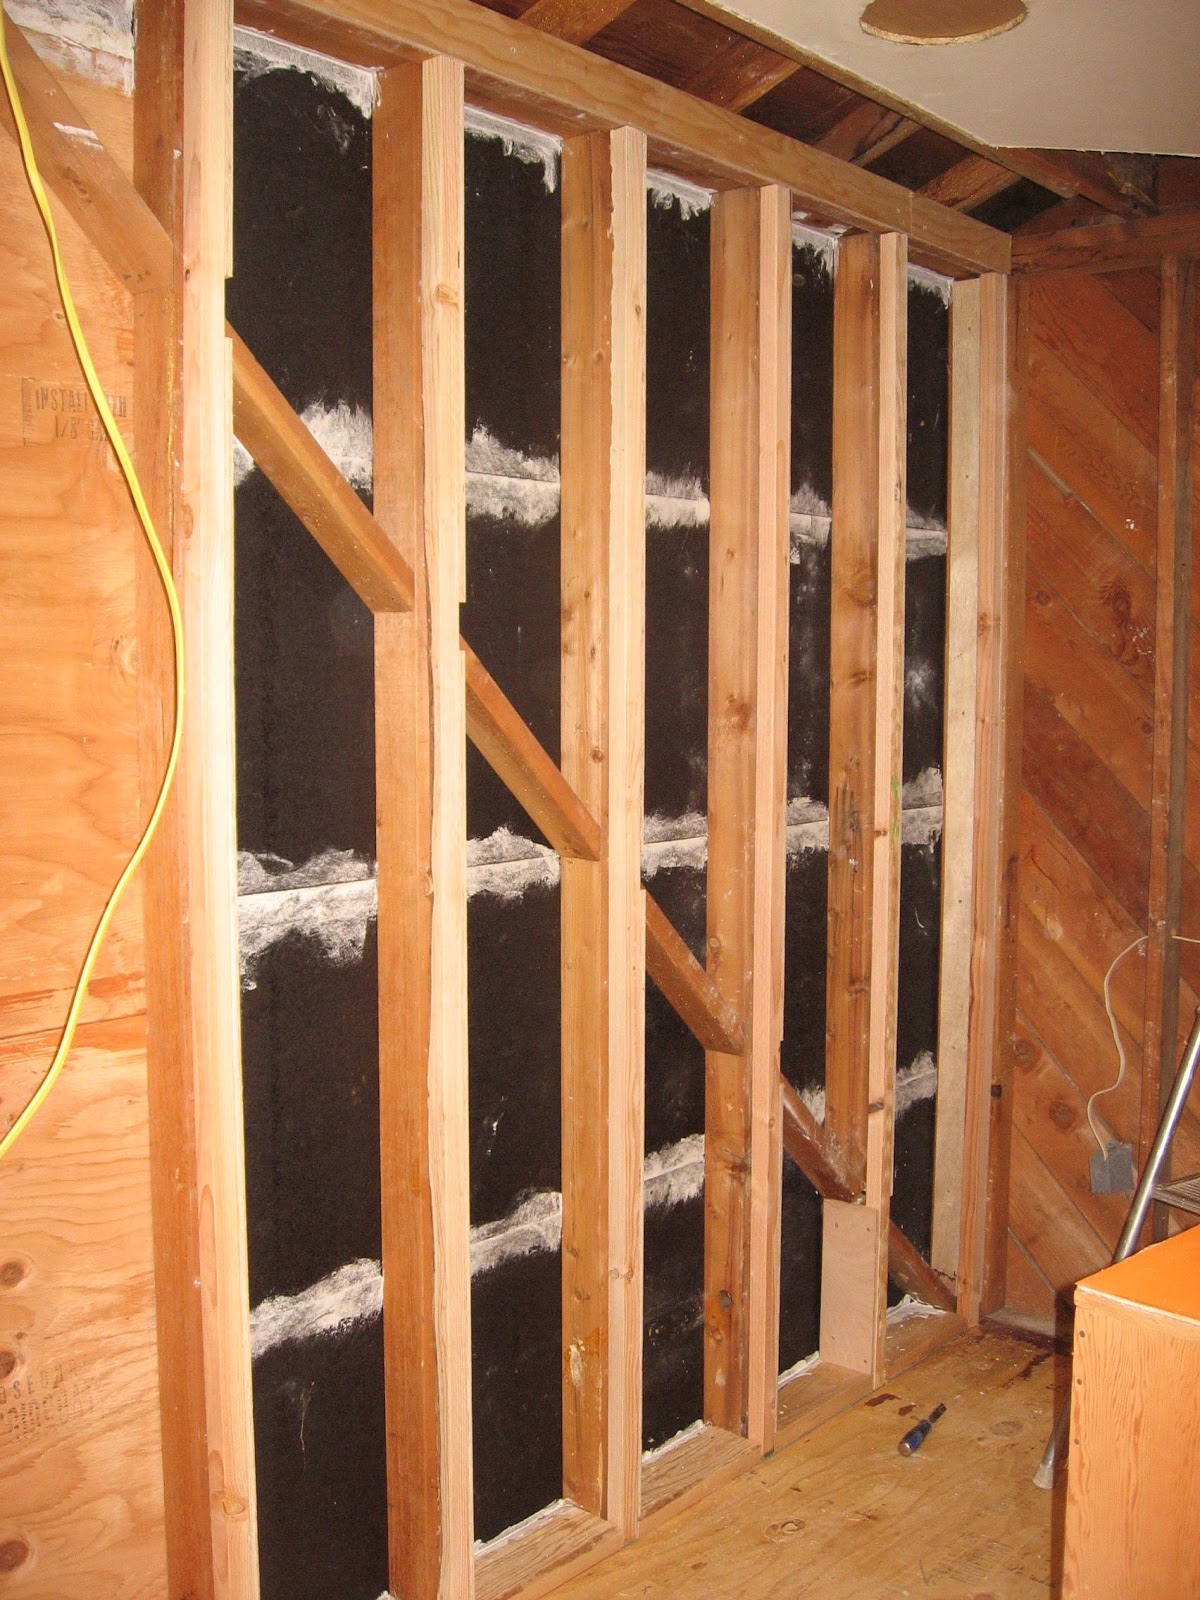
The traditional method for building a 2×4 wall is to make the top plate, then cut the studs to length and nail them to the top plate. As you can see from the image above, this method leaves gaps between 2x4s that are only filled with insulation.
This method of framing a wall is known as balloon framing because it creates a space between the studs (the balloons). Balloon framing is not as efficient at keeping heat inside your home as other methods of framing walls, especially if the ceiling is open or unfinished.
If you want to frame your walls on concrete, follow these steps:
Step 1: Make two temporary cross-members to hold up your top plate while you’re working on it. Use scrap lumber and attach them to both sides of your trailer hitch receiver. Then lay out your first course of 2x4s so they’ll line up with them when you position them in place.
Step 2: Cut all of your 2x4s down so they extend past the rear cross-member by 3 inches or so, but leave enough room behind them for insulation. (The height will vary depending on what type of insulation you choose.) Leave yourself plenty of room between courses too — at least 12 inches if possible — because
How to build a stud wall
A stud wall is a building element made of wood or metal that serves as a support for the structure of the house. It provides structure, stability and strength to the building.
The term “stud” refers to the vertical members used in construction. These members are typically square or rectangular in shape and are used in both load-bearing and non-load-bearing walls. The number of studs required depends on the width of your wall and its height.
Step 1 — Measure Your Wall
Measure the length and width of your room so you can determine how many 2x4s will be needed for your project. Make sure that you include any windows or doors when measuring this way. You should also consider notching out any corners that will be too tight for a 2×4 if necessary. For instance, if there is an electrical outlet on one wall, then another stud needs to be placed behind it with enough space between them so that cables can run through easily without being compressed or crushed by pressure from above.
Step 2 — Cut Boards with Circular Saw
Use the circular saw to cut each 2×4 into four equal lengths (for example: two 4′ pieces; one 4′ piece;
A 2×4 wall is a common framing system used in residential construction. It consists of two-by-four lumber placed 16 inches on center, with the joints staggered to prevent an even pattern. This type of wall is most often found in pre-engineered homes, modular homes and apartments.
The 2×4 wall is also known as a balloon frame or balloon construction because it resembles a large balloon when viewed from above. The 2×4 studs are attached at their ends with metal plates or clips called sill plates. The top plates are attached to the top of the studs and extend along the entire length of each side of the building. The bottom plates are placed between each pair of studs and extend from sill plate to sill plate at each end of the building.
2×4 walls can be constructed using several methods:
Strap-on blocks: These blocks hold two pieces of wood together at right angles so they form a corner joint that holds up better than a miter joint would; they are commonly used for corners where two pieces meet at 90 degrees (angles).
Mitered joints: In this method, both sides of the corner joint are cut at 45 degrees so they fit together
If you’re building a wall that’s longer than 16 feet, you’ll need to use special framing techniques. Studs placed directly on concrete will not be stable enough to support the ends of the joists above them. In addition, the studs will be subject to moisture damage from the concrete itself. By using metal “hangers” instead of nails or screws, you can build a steel stud wall on concrete without worrying about sagging or cracking.
Use metal “hangers” instead of nails or screws when building a steel stud wall on concrete. These hangers are available at most hardware stores and come in different sizes for different-sized studs. They allow you to hang your studs with minimal effort and without damaging your walls.
The first step in framing a wall is to measure the distance from the floor to the ceiling and mark the height of each stud on the floor.
If you have a long wall, such as a garage, you may need to frame it in place. To do this, you will need to cut each stud so that its top end is even with the top of the wall plate (or just below it).
To do this, measure down from the top plate until you get to your desired height. Then mark this height on all 4 sides of your studs using a chalk line or 2×4 as a guide. Cut each stud at this mark and use them as spacers between the bottom plates of your walls.
For shorter walls like those found in basements or closets, you can simply frame them in place without cutting any additional pieces.
In order to add strength to your walls and prevent them from bowing outwards under heavy loads such as furniture or appliances, you should also install ledger boards along their tops as well as double top plates on both sides of each wall.
The ledger boards should be installed horizontally between two adjacent studs so that they run parallel with
A stud wall is a common type of partition used in residential construction. It can be used as a load-bearing wall or a non-load-bearing wall. A stud wall is made up of vertical wooden boards called studs, which are connected to each other with nails or screws. Stud walls are usually built with 2x4s or 2x6s for the lower portion of the wall and 2x4s for the upper portion. These two types of lumber are strong enough to support most standard ceiling joists and roof rafters. They also provide adequate insulation from outside temperatures, which makes them perfect for cold climates.
/cdn.vox-cdn.com/uploads/chorus_asset/file/19497332/howto_partition_14.jpg)
To build a stud wall on concrete, you will need:
A level surface that is large enough for the entire length of your wall
Chalk line (optional)
Hammer and nails (optional)
Tape measure
Use a chalk line to mark the stud locations on the concrete wall. Use a level to make sure that the lines are straight and level.
Use a hammer drill or masonry bit to drill holes through the concrete into the wood framing below. The size of the hole depends on the size of your screws or bolts, but they should be at least 1/2″ larger than the diameter of your fasteners so that they can pull their way in as they tighten.
Install metal anchors into each hole, then drill another hole into each anchor location with a small bit so that you can install it properly. These anchors will keep your fasteners from pulling out when you tighten them down.
Drill pilot holes for each screw or bolt you’ll be using to secure your wall. This helps prevent cracking or splitting of your concrete when you drive the screw in place.
Screw or bolt each stud into place at least every 24 inches apart using either 6″ long lag screws or 16″ long bolts depending on how far apart you want your studs spaced
The most important thing is to make sure that the wall is level. The best way to do this is with a laser level, but you can also use a chalk line or a level.
If you are using metal studs, make sure that they are installed perfectly straight and flush with each other. If necessary, use shims to make them level.
When attaching metal studs to concrete walls, use expansion anchors to secure them in place. These come in different sizes and are made specifically for concrete walls.
If your walls are not perfectly plumb and level, you should consider using adjustable metal studs like these ones from Amazon instead of traditional wood framing lumber. This will allow you to adjust the height of the studs as needed during construction without having to tear out any drywall or re-framing later on down the road when it’s too late.