Building an island is not something that you hear everyday. However, there are a few people who had the opportunity to create their own. For example, one man in Tahiti was inspired to buy some land because of his dissatisfaction with the government. So, he bought some land and started building his own island. The man created a sustainable living space for his family by growing fruits, vegetables, and livestock for food. The family no longer need to depend on others for money.
How to build your own island (www.howtobuildyourownisland.com) teaches you how you can build your very own island and hire it to boats, people and even hotels.
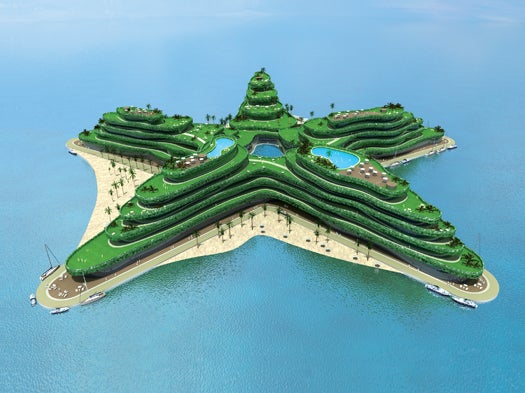
How to build a island
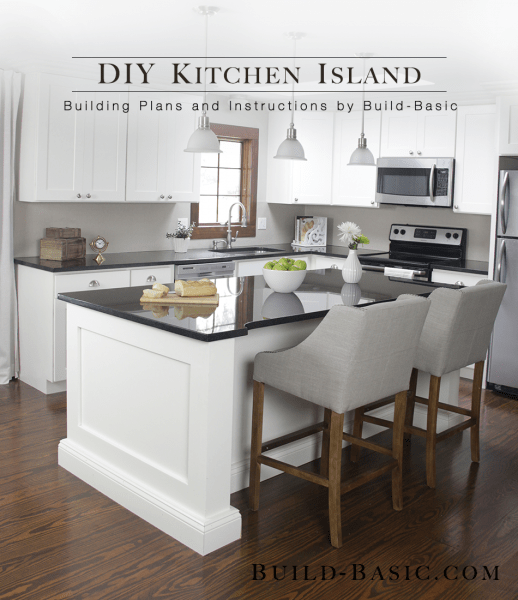
When planning for your next kitchen remodel, add an island to the list. No, not just any island — one that’s custom-made to incorporate all of your favorite features and materials. In this article we will walk you through the process of designing and building your own custom island in just four easy steps.
Step 1: Determine Your Needs
Before you start drawing up plans, take some time to think about what kind of island will suit your needs best. If you have limited space, consider building a floating or wall-mounted island instead of one that extends into the middle of the floor. If you’re looking for additional storage space, include drawers or cabinets in your design. If you want to increase the value of your home by adding more living space, consider adding an additional countertop or sink on top of your new kitchen island plan!
Step 2: Create a Sketch
Once you’ve figured out what kind of kitchen island you want, it’s time to get down to business and create some designs. You can start off by sketching out your basic layout on paper; as long as it looks good enough that no one will notice when they
How to build a island bar
Building an island bar is a great way to add functionality to a kitchen. An island bar is basically a countertop that extends from one wall of the room and meets another countertop at right angles, forming the shape of an “L”. The space between these two walls acts as a sort of peninsula in your kitchen, providing extra counter space, storage and seating.
Building an island is not difficult but requires some carpentry skills, tools and materials. Read on for our step-by-step guide on how to build an island bar.
Step 1: Measure the area where you want your island bar to be built. This will help you determine the size and shape of your new countertop. You’ll also need to consider where the plumbing pipes are located so they won’t be visible after installation.
Step 2: Cut two pieces of plywood (or MDF) that will be used as supports for your countertop by measuring out the circumference of each support board and cutting them accordingly with a jig saw or circular saw with a carbide blade (this makes it easier for cutting through both sides of each board at once). Make sure these boards are slightly longer than the width of your countertop so that when
Building an island can be a great way to expand your kitchen. It can also be a great way to create more space for entertaining.
Here’s how to build an island:
1.Choose the right materials
Start by deciding on the type of island you want to build. You may want an L-shaped countertop with seating on one side, or perhaps you want a freestanding island with three sides and open shelving on the fourth. Either way, you’ll need to choose your material. If you’re going with an L-shaped countertop, consider using laminate instead of hardwood so it won’t scratch easily and will be easier to clean up (and replace if necessary). For freestanding islands, look into butcher block because it’s durable and easy to care for.
2.Get your measurements right
Measure the space where you want your island and make sure it fits comfortably in the spot without blocking any doors or hallways or being too close to other appliances like dishwashers or ovens that might get hot and cause damage over time. Keep in mind that many islands have drawers or cabinets underneath them so there needs to be enough room for these things as well as for people
Building an island can be a great way to add space, style and function to your kitchen.
The first step is to pick out the right island design for your space. There are many different sizes, shapes and materials available that can help you create a look that fits with your style and budget.
Next, measure the space where you want to put the island. You’ll need enough room for it to fit comfortably in the space without bumping into other things such as cabinets and appliances.
Then decide how much countertop you want on each side of the island — typically 24 inches is standard for a double sink or two-burner cooktop.
When choosing material for an island top, make sure it’s durable enough for everyday use. Granite or marble are excellent options because they’re easy to clean and maintain, but they can be costly depending on the size of your countertop. Laminate is another option that’s less expensive than stone or wood, but still looks great and comes in many colors and patterns.

Finally, decide if you want storage space underneath your island top so you have more storage room in your kitchen — this is especially helpful if you have limited cabinet space already!
Building an island is a lot like building a kitchen table or desk. The process for building an island is very similar to building a countertop. The main difference is that you will attach the island top to legs instead of directly to your cabinets.
We’re going to build this island using Ikea cabinets and countertops, so you can use the same technique if you want to buy those instead.
The first step in building this island is to measure and cut all of our pieces at the same time. We’ll be cutting two long support beams, two short support beams, two long legs and four short legs from 2×4 lumber. For this project we’re using 12-foot 2x4s (actual size 1 3/4 x 3 1/2 inches), which are about as long as most people would want for an island like this one (it could go up to 16 feet if you wanted). But if you want something shorter or longer than 12 feet, just adjust the measurements accordingly!