Building a corner shelf is a common task for woodworkers. However, it is important to ensure you build the structure safely and securely, otherwise it may collapse.
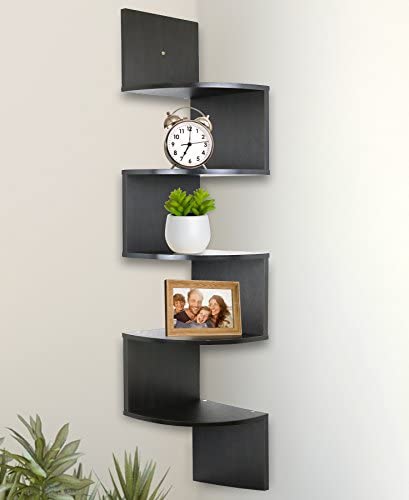
A corner shelf is a great freestanding furniture item to have in any room. It adds style, stores items, and can serve as an extraordinary focal point. Whether you’re looking to add one in your bedroom, living room, bathroom or kitchen, check out this step by step guide on how to build a corner shelf unit.
Corner shelf
1. Construct the frame of the corner shelf by cutting out two pieces of wood that are each 17 inches wide and 3 feet long. These will be the vertical sides of the corner shelf unit. Then, cut two pieces of wood that are 13 inches wide and 3 feet long for the horizontal sides of your corner shelf.
2. Place one of the vertical side pieces on top of one of the horizontal side pieces at a 90-degree angle to it. Drive 2-inch screws through the side pieces into each other to secure them together. Do this for both sides, so that you have essentially created a box with open sides on one end and closed sides on another end.
3. Measure 1 inch from each edge of one end piece and make marks every 6 inches along those edges using a ruler or measuring tape. This will give you 12 marks total, which is exactly how many holes need to be drilled into your second end piece in order to accommodate attaching your first end piece to it by means of screws later on in this process (see Step 4). These holes should be drilled only halfway through the wood, since they will not be visible once you attach this first end piece to your second
Corner shelves are a great way to add storage space and style to your home. They’re easy to build and they can be built with just a few simple tools. If you want to learn how to make your own corner shelf, follow these steps.
Step 1: Measure the space that you want to fill with your shelf. Measure from the floor up, then from one side of the wall to the other. The measurements should be at least 4 inches shorter than the height of your chosen shelf unit – this ensures that when you install it, it will fit snugly against both walls.
Step 2: Cut two pieces of wood for each shelf bracket using a jigsaw or chop saw (a circular saw would also work). The length of each piece should be equal to half of the distance between the floor and ceiling (or whatever distance you measured in step 1). So if your measurements were 36 inches apart, one piece would be 18 inches long while the other would measure 24 inches long.
A corner shelf is a unique and versatile piece of furniture that can be used in any room of your home. They can be built to suit any size space, and with the right corner shelf plans you can build one yourself.
When it comes to building your own corner shelf, you want to make sure that you use the right materials and follow the proper steps so that it turns out just like you imagined. Here are some tips on how to build a corner shelf.
What You’ll Need:
Corner Shelf Plans – These will show you how to build a corner shelf based on your specific needs, whether it’s for books or other items. You should also have some experience with woodworking tools like saws and drills so that you know how to use them correctly.
Building Materials – You’ll need wood for this project as well as nails, screws, glue and some paint if you want to finish off your project nicely. Make sure that all of these materials are available before starting work on your corner shelf!
A corner shelf is a great way to add extra storage to your home. It can be built in any size and can be customized to fit any room. The construction of a corner shelf is simple, but the design options are endless. You can use this tutorial to build a basic corner shelf, then customize it to your needs.
![Talia Grey Corner Bookcase | Modern Furniture Deals [70% Off]](https://cdn.shopify.com/s/files/1/0456/9829/products/talia-corner-bookcase-bookcase-soak-agrey-modern-furniture-deals-4.jpg?v=1606220021)
Corner shelves are great for any room in your home, but they’re especially useful in kitchens, where space is often limited. The shelf can be mounted to a wall or even the corner of a room, and it can be used for displaying dishes, plants or other decorative items.
Materials
Shelving: 1-by-4s or 1-by-6s (4 feet long)
Corner brackets: 1¼ inches* (sold as pairs)
Nails: 2½ inch nails*
Brackets: Use two brackets per shelf*
Steps to Build a Corner Shelf
1. Measure the back of the wall where you want to place your shelf, taking into account the thickness of your material. Make sure that if you are building a corner shelf unit, it will reach all four walls; if not, make sure there is enough space on one side for it to be placed.
2. Mark off the area with a pencil and then use a circular saw to cut out the opening in your wall. If you are using drywall or plasterboard as your material, be careful not to cut too far into the studs before turning off the saw or else they may fall out of place. This can cause damage to both your saw and yourself!
3. Once you have cut out the right shape, use a hammer and nails to secure it in place (you may want to use some shims here too). Make sure everything is level and straight before securing it as this will make things easier later on when sanding down any bumps that may have been created during installation!
4. You will now need to build your corner shelf unit itself; this involves attaching two frames together at 90 degrees from each other (like an L shape) so that they form a corner when finished
How to Build a Corner Shelf Unit
Whether you’re looking for a way to add storage space or wanting to fill an empty wall, a corner shelf unit is a great option. You can choose from traditional woodworking joints or use power tools for quicker construction. Either way, it’s easy to build your own corner shelf unit using these simple steps.
Step 1: Cut the Legs
Cut two equal lengths of 2×4 lumber. These will be the legs of your corner shelf unit. Use a circular saw to make straight cuts, but if you don’t have one, you can use a handsaw and miter box to do this step by hand (see video above).
Step 2: Attach the Legs
Lay down two 2×6 boards so they’re parallel with each other and as close together as possible without touching each other. Position one leg on top of each board so it’s centered between them and flush with the edges of both boards. Use several long screws to attach each leg firmly in place. Make sure not to overdrive or strip out screws during this step because it’s important that all four legs remain sturdy throughout construction.
Step 3
Corner shelving units are a great way to maximize your space and add more storage for your home. They are also very easy to build yourself with just a few tools and supplies. Here’s how to build a corner shelf unit.

Materials:
2x4x8′ lumber (or whatever size you want)
1x4x8′ lumber (or whatever size you want)
1/2″ plywood (or whatever thickness you want)
Wood glue
Finish nails or screws
A corner shelf unit can be a great addition to any room in your home. It can be used for storage or display items, or even both. This is a project that you can easily do yourself, but it does require some woodworking skills and tools.
Build a Corner Shelf Unit
Cutting List:
1 2×4 at 96″ long
2 2x4s at 18″ long
1 1/2″ pocket hole screws (1 1/4″) and pocket hole jig
3 1/2″ screws (3″) and drill with countersink bit
How to make a corner shelf. This is a simple and easy project that you can make in only a few hours. It’s perfect for the garage, basement or any other room in your house.
Img
Materials needed:
1x 4×8 cedar board (or 1x 4×8 pine board)
1x 2×4 cedar board (or 1x 2×4 pine board)
2x 2″ screws (to screw the shelf unit together)