
The closet is a room that requires the utmost privacy and this can be achieved by installing frosted glass doors. This prevents others from looking inside the closet and improves security as well. There are different types of doors to choose from when you are installing them but if your choice is frosted glazed, then you must know how to install them since they are not as easy to change or replace once opened between two walls.
Frosted glass sliding doors are the source of both security and a sense of openness, beauty, and calmness. In this post we will talk about how to put frosted glass in a door and how to replace sliding glass closet doors.
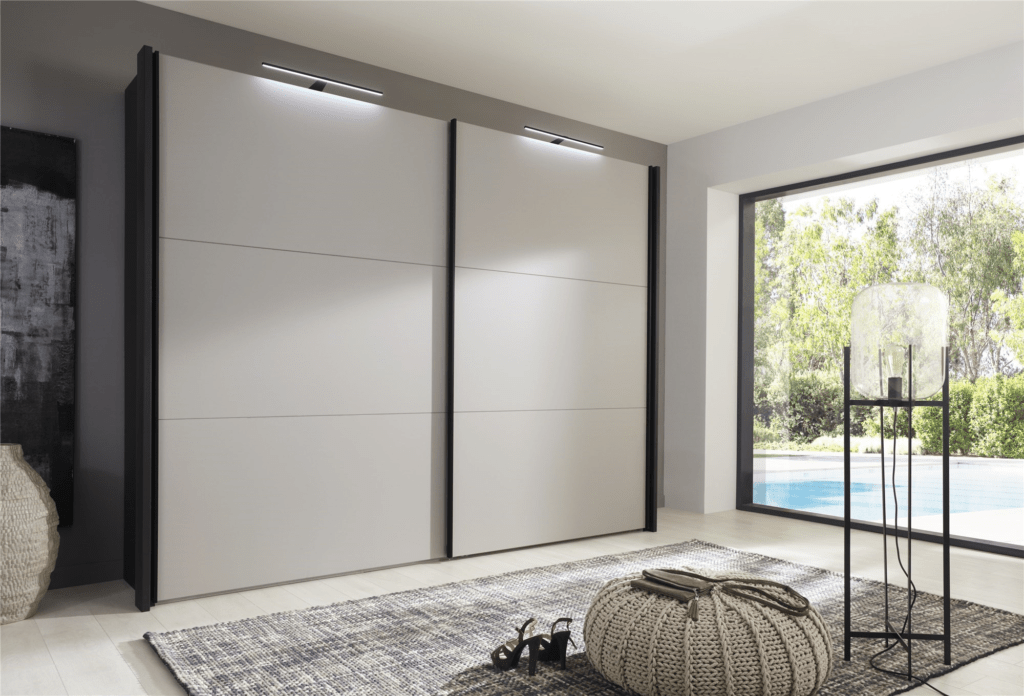
Frosted glass sliding doors for closet
Frosted glass sliding doors for closet can be an excellent choice for any closet. They offer privacy and a touch of elegance to the room.
However, if you are planning to replace your sliding glass closet doors with frosted glass, it is important that you know how to do it yourself.
Replacing Sliding Glass Closet Doors
1. Take out the old sliding glass door. If you have a single-hung door, remove the top and bottom rails from their respective hinges before removing the panel from its frame. If you have a double-hung door, simply remove the lower panel from its frame by unscrewing it or taking off its hinges.
2. Measure your new doors to make sure they will fit properly into place. If they’re too big or too small, file down one or both sides until they fit perfectly within your opening; then paint them so they blend in with your existing interior décor once they’re installed.
3. Put in new hardware when installing new sliding glass doors for closets by screwing in hooks onto the back of each panel with a drill/driver or screw gun (depending on the type of screws). Then snap on end caps and secure them with screws so that they don’t fall off
Replacing your sliding glass closet doors is an easy project that will make a big difference in the look and feel of your room. It’s also a good opportunity to upgrade the hardware on your sliding glass door, which you may have been meaning to do anyway.
First, remove the old doors and hardware. Then decide what type of new door you want: skylight or vertical paneled. If you’re replacing both sides of a double-sided unit, buy one complete set of new hardware for each side.
If you only need replacement parts for one side, measure carefully before buying hardware so that it fits properly into the existing track and frame. And don’t forget to measure the thickness of the new panels if they’re thicker than the originals; otherwise they won’t slide smoothly into place when you’re done drilling holes in them!
Frosted sliding glass doors are an excellent way to add a bit of privacy and style to your home. The frosted glass allows light to come in, but it keeps people from seeing into the room. Installing these sliding glass doors is not as simple as installing regular glass doors. You need to follow certain steps to ensure that you do not damage the door panels during installation.
Here are some tips that will help you install frosted glass sliding doors in your closet:
Measure the door opening and choose a size for your sliding glass door. You can choose from different sizes such as 24×80 or 24×84 inches. Make sure that you order doors that match your measurements exactly so that they fit perfectly into your closet opening.
Remove any obstructions such as shelves or other items from the door opening so that they do not interfere with installation. Remove all the old hardware from the closet door and replace them with new hardware if necessary so that it matches the new frosted glass sliding doors perfectly.
You don’t have to live with boring, bland closet doors. This is a great way to add some style and personality to an area that’s often overlooked.
I love the look of frosted glass sliding closet doors. They’re affordable and easy to install. Plus, they’re super easy to clean!
If you’re ready for a change, here’s how I did it:
Materials needed:
Frosted Glass Sheets (I bought mine at Lowe’s)
Spray Bottle of Water (You can use vinegar or lemon juice too)
Disposable Paint Brush (I used an old one from an art project.)
The process of installing sliding glass doors for closet is pretty simple. The first step is to measure the width and height of your closet, then subtract about 3/4″ from each dimension for the thickness of the door frame. Next, you’ll need to determine how many panels you want. Most people choose two or three screens in a row, but you can get away with only one if desired.
Determine the number of panels by measuring across the width of your closet and dividing by the number of panels (i.e., if your closet is 8′ wide, 4′ divided by 2 = 2). Measure from floor to ceiling and divide this number by 1/2″, which is how tall each panel will be (8′ / 2 = 4′). Place marks on the wall showing where each panel will be placed. The bottom edge should be level with the top of your baseboard trim, and the top edge should reach just above your head when you stand at the center of your closet door opening.
Measure down 1/2″ from each mark and make another mark on either side so that there are four marks that are evenly spaced apart – these are where you’ll screw in your support brackets onto the wall (the top one will be
Replacing sliding glass closet doors is a quick and easy project that you can do on your own. You will need a screwdriver, waterproof caulk and a saw to cut the door down to size if it doesn’t fit right. After the door is removed, all you have to do is slide in your new door and secure it with screws.
Removing Sliding Glass Closet Doors
1. Unscrew the hinges from the door frame. There should be two screws on each hinge, but you may find more depending on how old your closet doors are. If there are too many screws for you to remove them all with a screwdriver, use a drill instead so that you don’t strip any of the heads or break any of them off.
2. Open both sliding glass doors all the way and place them flat against each other so that they form a single pane of glass. This will make it easier for you to remove them from the frame without breaking them or allowing any water into your home during heavy rainstorms when one pane slides out of place and another pane slides back into position over it instantly leaving no gap at all between
The first thing to consider when replacing sliding glass closet doors is what the new door will look like. If you have an existing frame, the replacement door will be a standard size, so there’s no need to worry about whether or not it will fit. However, if you’re installing new sliding glass closet doors over an existing wall, you’ll want to make sure that the dimensions of the replacement doors match those of the existing frame.
In addition to making sure that your new sliding glass closet doors are the correct size, there are other considerations when selecting replacement doors. For example, you’ll want to decide whether or not you want frosted or clear glass in your new doors. If you’d like privacy in your closet but don’t want to sacrifice light and space by adding window coverings, then clear glass might be best for your needs. However, if privacy isn’t as important as light and space then frosted glass may be a better choice for your home.
You should also consider whether or not you want aluminum or wood frames for your new doors. Aluminum frames can easily be installed over an existing wall without any additional framing required for support; however, they do require professional installation because they are heavier than wood frames and can
Replacing sliding glass closet doors is a simple woodworking project that can be completed in under an hour. All you need is a saw and a screwdriver. The replacement doors should come with all the hardware needed to install them on your existing track system.
Step 1 – Remove Old Doors
Slide the old door out of the track using a screwdriver as leverage for each side. Remove the top pins from both sides of the track by lifting them out with a flat-head screwdriver. The bottom pins are easier to remove by prying upwards on them with a flat-head screwdriver from the bottom of the frame.
Step 2 – Install New Doors
Place your new door into the opening and slide it back into place until you hear it lock into place with a click sound. If your new door has an inner glass panel, place this into its slot before sliding back onto its track (see manufacturer’s directions for this), otherwise leave it off for now. Next, push down on each side of the track until you hear it lock into place again with another click sound. Finally, insert all top pins back into their slots and replace bottom pins as well if they were removed
Replacing sliding glass closet doors can be a fun and creative way to update your home’s look. To replace the sliding glass closet doors, you’ll need the following tools:

Screwdriver (Phillips)
Hammer
Claw hammer (optional)
Level
Utility knife or box cutter
Pencil or marker
Drill with bit set (if needed)
Replacing sliding glass closet doors is not a difficult project if your existing door is in good condition. If the door is old and damaged, however, you’ll have to replace it before installing new glass.
The first step in replacing sliding glass closet doors is removing the existing unit. Turn off the power to the closet before beginning work and remove any items from inside the closet. Remove the screws that hold the track to the wall studs using a screwdriver or drill/driver with a Phillips head attachment. Lift or slide out one end of the track, then remove it from both sides of the wall.
Remove any trim that covers the sides of your old door and set it aside for reuse on your new door. Trim typically consists of several pieces that must be removed individually so they don’t get mixed up during installation. Remove all of them from their respective sections before proceeding further with installation.
Take apart your old door by unscrewing all hinges and removing them from their respective sections of trim on both sides of your old sliding door system. You may find that some pieces are missing or damaged beyond repair; these can be replaced by those that came with your new unit (typically included).